Children's Book Shelf
Children’s Book Shelf Build - A Book Nook Story
Wow! How time flies! What seems like a million years ago now, but was actually only 10 years ago, I built this custom “Book Nook” for a family member. We designed this book nook specifically to house children’s books so the design is a little different than a traditional bookcase. Let’s get started!
Design Elements
Because this bookcase was going to be used specifically for children’s books, it was meant to be a bit shorter. In this case, it is only going to measure about 36 inches in total height.
Another design element is we wanted it to be more visual. What I mean here is that with a traditional bookcase, all you typically see is the spine of a book. Children are a bit more visual so we wanted the books to face forward; so you can see the covers of the books. This makes total sense when you think about it; a child can just walk up, see all of the books and select their favorite one!
Many children’s books are fairly large and wide as well so we wanted to be able to fit several of them in a row, this meant that the bookcase was going to be about 42 inches wide.
It Starts with the Sides
For this build I am going to be using solid cherry wood. I have made a few other pieces for this family member out of cherry wood so we wanted to stay with the theme.

I broke down the cherry wood and then did the usual milling process; run the pieces of the jointer to get them flat, then through the planer to get them to thickness, then back to the jointer to edge joint and get them ready for glue up.

Getting the grain oriented

Bookcase panel ready for glue
Once the side panels were glued up, I cleaned up all the glue and sanded the pieces to 150 grit in order to start working on the joiner.
Bookcase Joinery
The bookcase is going to have three shelves so I decided to use dados to join the shelves and sides together. To do this, I used a router with a 3/4 inch plunge bit to rout a series of stopped dados into each of the side pieces. Here you can see those dado and how they match up with their other side.

Routed dados
As you can see, the dados are all staggered towards the back; like stadium seating. I felt that by pushing each shelf a little back from the one behind it, it would make the bookcase more stable and less likely to fall forward; and it did.
Next, I used my Veritas router plane to ensure that all of the dados are flat on the bottom and all the exact same depth. Once I cleaned up the bottom of the dado I used chisels to square up the rounded corners left by the router bit.

Dados cleaned and squared
Shelves Get a Little Lippy
The next consideration was how to keep books on the shelf. Because the books would be facing forward, I wanted to keep them from just sliding off of the shelves. So, I decided to add a piece of shop made moulding across the front of the shelf. For the bottom shelf, I used the base trim moulding to create my lip there. This shop made moulding is nothing more than a piece of cherry with a little ogee profile routed into it; just a little something to break up the lines a bit.

Ogee profile on trim moulding

Front view of moulding in place
Adding Book Retainers
In order to keep books from tipping forward, and to be able to stand them up straighter, I added some strips of cherry part way up the shelves. These were put in place using some dowels. So, I laid the side pieces back down and marked out some holes where I wanted the retainers to be. I then used a Forstner bit to drill some holes part way into the sides of the bookcas.

Dowel holes in reference to the shelf dados
I then used a doweling jig to put a dowel into the end of the cherry retaining strips.

Here you can see how the retainers fit in correlation to the shelves.

Here you can see a dry fit of the sides with the shelves, the lip moulding and the retainers all in place.

Finishing Touches
As you can see in the dry fit picture above, this thing is awfully boxy and not super attractive. I decided to play off of the curves in the ogee profile on the moulding to add a little bit of a profile to the sides of the bookcase. I felt like if I added a nice curve to transition from one shelf level to the next, that would really look nice and break up the sight lines of the side. Basically, make it less boxy. This is one of those design elements that you have to kind of draw out and experiment with until it looks right to the eye. Here is the profile design I came up with.

Curve transitions from shelf to shelf
I cut these profiles on the bandsaw and cleaned up the saw marks with spokeshaves and sandpaper.
The last order of business in the build was to glue up all the sides, shelves, etc and start to add back onto the shelves. Here you can see everything in the clamps and I’m starting to add the back panes. Because each shelf stops where the shelf above it starts, it gave me a natural place to be able to attach the back pieces.

Once all of the glue was dried and cleaned up I did some final touch-up sanding and applied my finish. My go-to finish for cherry wood is just a natural oil...and time. You can read more about how I finish cherry wood in this article here: How to Finish Cherry Wood
For this piece, I applied multiple coats of a tung oil finish and rubbed out the final coat with 0000 steel wool and wax. Here are a couple of shots of the piece after it was done.

Finished and ready for books!

Fully loaded bookcase
The cherry has a nice color to it, but it is still that creamy reddish color you get once cherry has been freshly milled. Here are a few pictures of the same bookcase, nearly 10 years later.

Bookcase about 10 years later
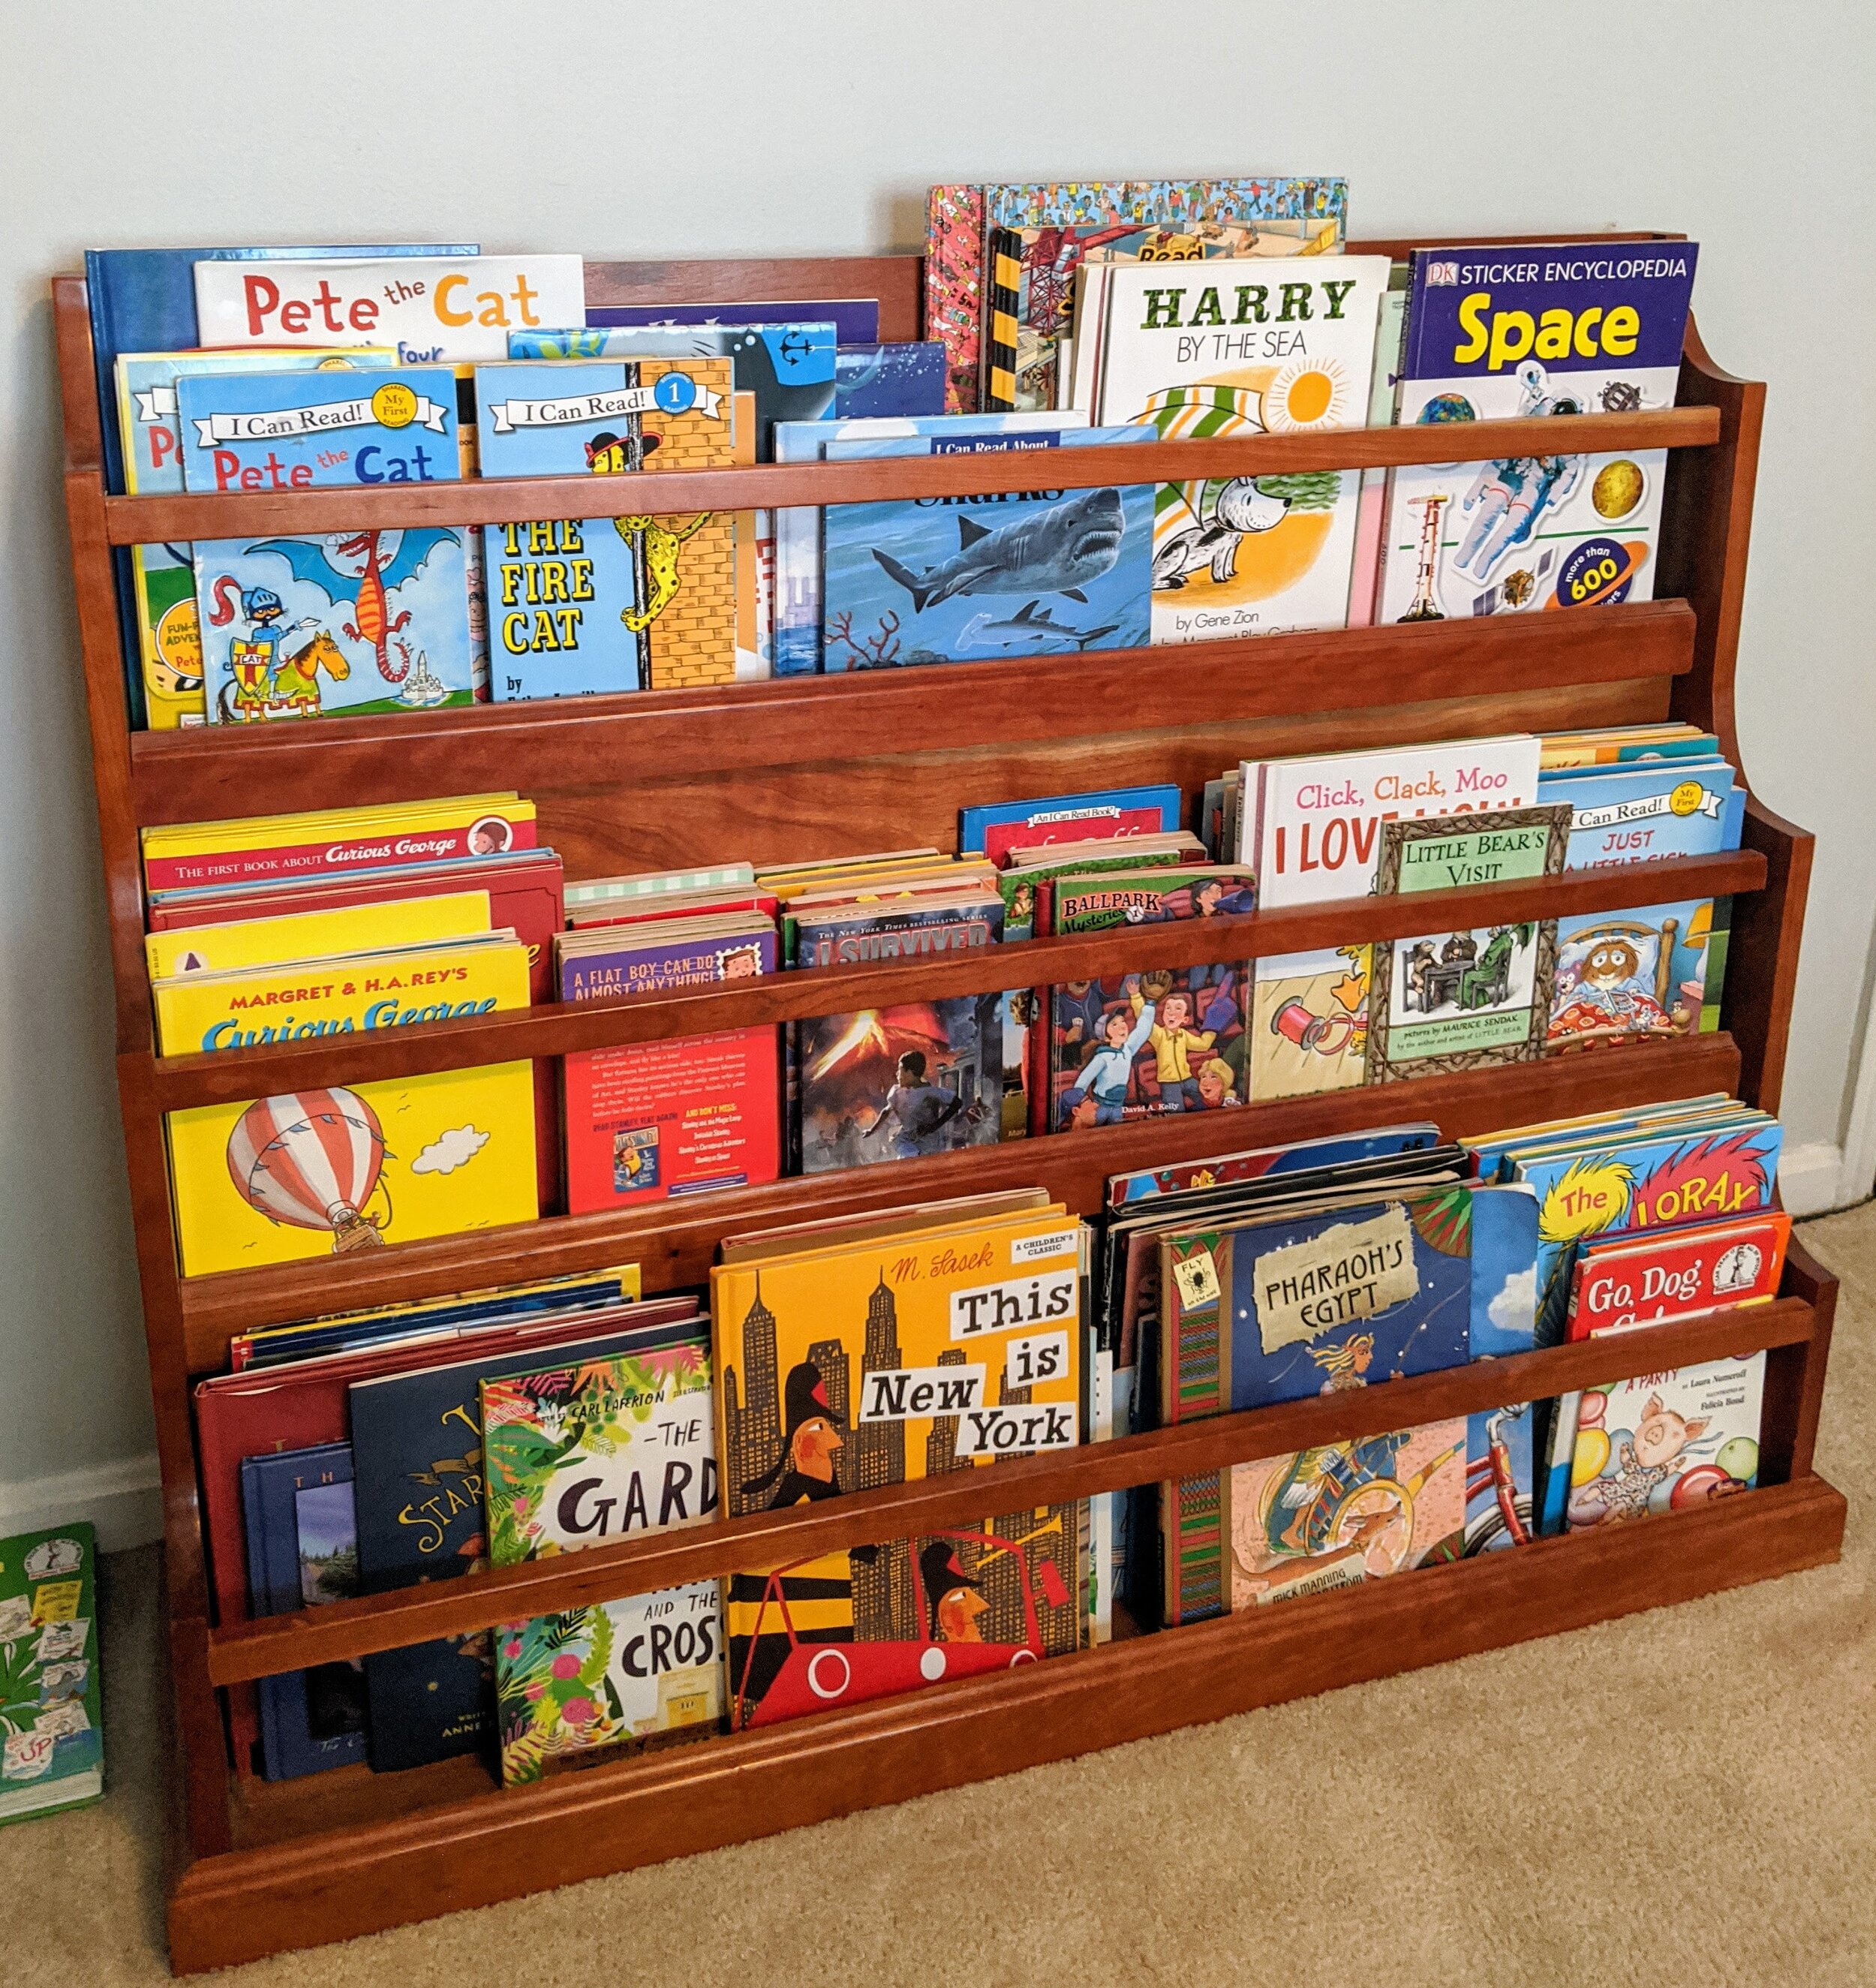
Nice dark patina after 10 years of service
As you can see, that cherry has really aged well and has that naturally dark patina everyone is after.
Conclusion
This was a really fun little project to build and has served my family members very well over these years and is still in use today. It is such a perfect little piece and a clever way of storing children’s books and making them easily accessible at any time.
I hope you enjoyed this build. If you are interested in a project of your own, feel free to contact me through the form below. Thank you!
Disclosure: Some links in this article are affiliate links meaning, I may get a small commission if you purchase anything from these links. Thank you for your support!


About Me…
Welcome to my blog. My name is Derik VanVleet and I am the owner/builder of VanVleet Woodworking llc. I hope you find this blog useful and insightful. Feel free to leave a comment in the bottom. Thank you!