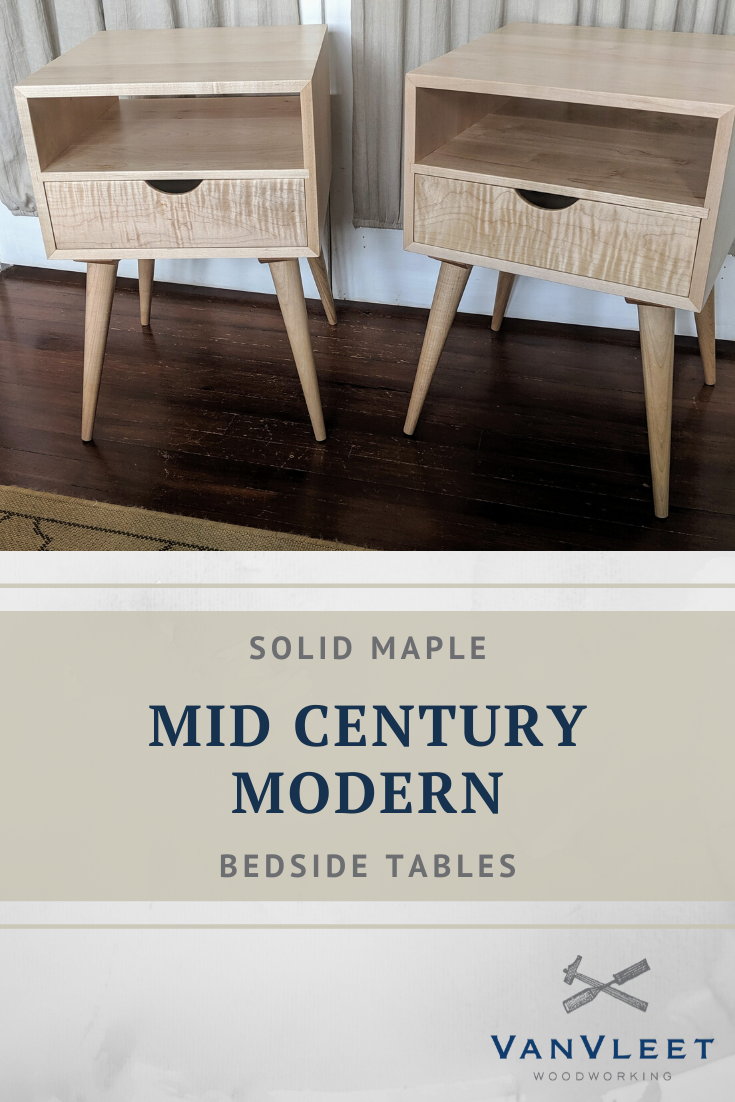
Mid Century Modern Side Tables
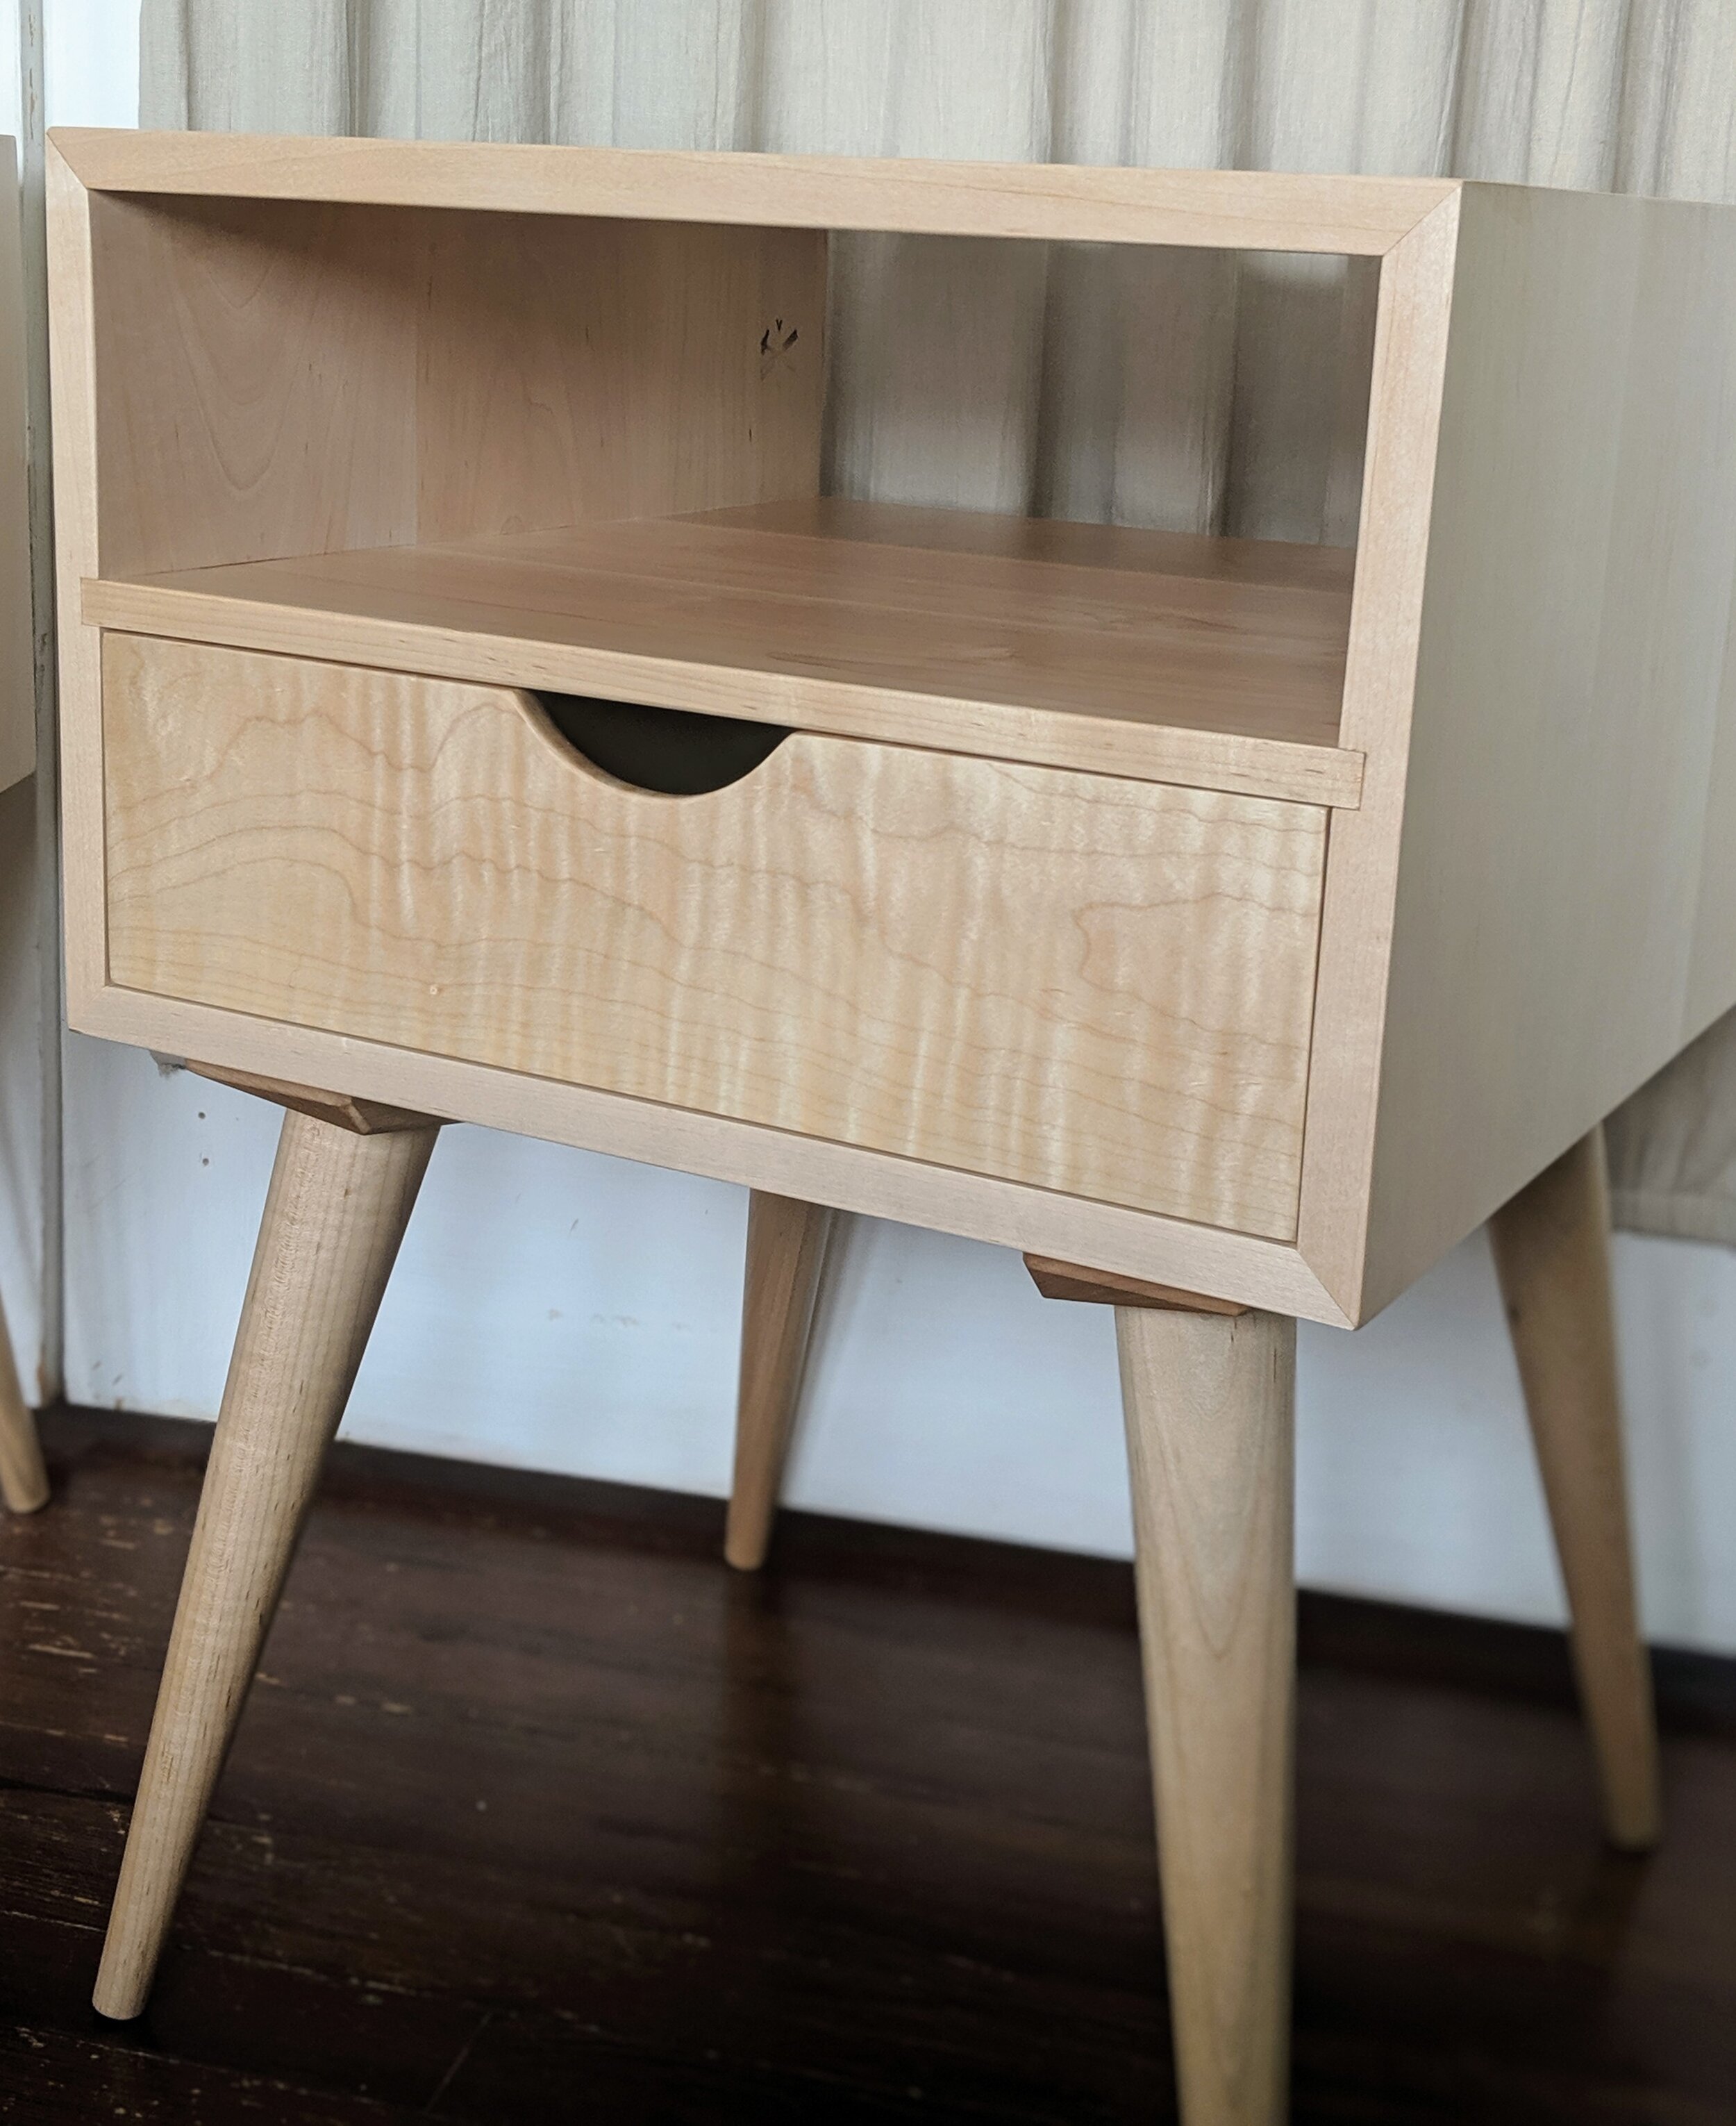
Maple Mid Century Modern Bedside Tables
I love my clients. My clients love the Mid Century Modern style. Therefore, I also love the Mid Century Modern style. In all seriousness, before I first started building in the Mid Century Modern style, I was not really a fan of it. I think I had seen too many “DIY” “Makers” building in this style, but not in a way that followed good design and build principles. So I think that turned me off to the style...until I started building it!
“Adult Bedside Tables”
One of the opportunities to build in the Mid Century Modern style came about as a result of the Inman Park Festival last year in Atlanta. I was an exhibitor at the show, for the first time, and had a blast!
During the show I met a great client who said “I need adult bedside tables! I am sick of my Ikea college tables”. So, we scheduled some time to meet and go over some designs she had in mind. During that design consultation we discussed what woods would work best in the bedroom as well as measured the bed height as that would be a driving factor in the overall height of the tables.
As a rule, you want a bedside table to be as tall as your mattress is, or just a couple inches above the mattress. The idea is, it is easier to reach up for something, than to reach down. But, like with most things, it is really up to the person using the table that determines the height. Another great reason why having someone build you a custom piece, to your specifications, makes sense.
Design Details
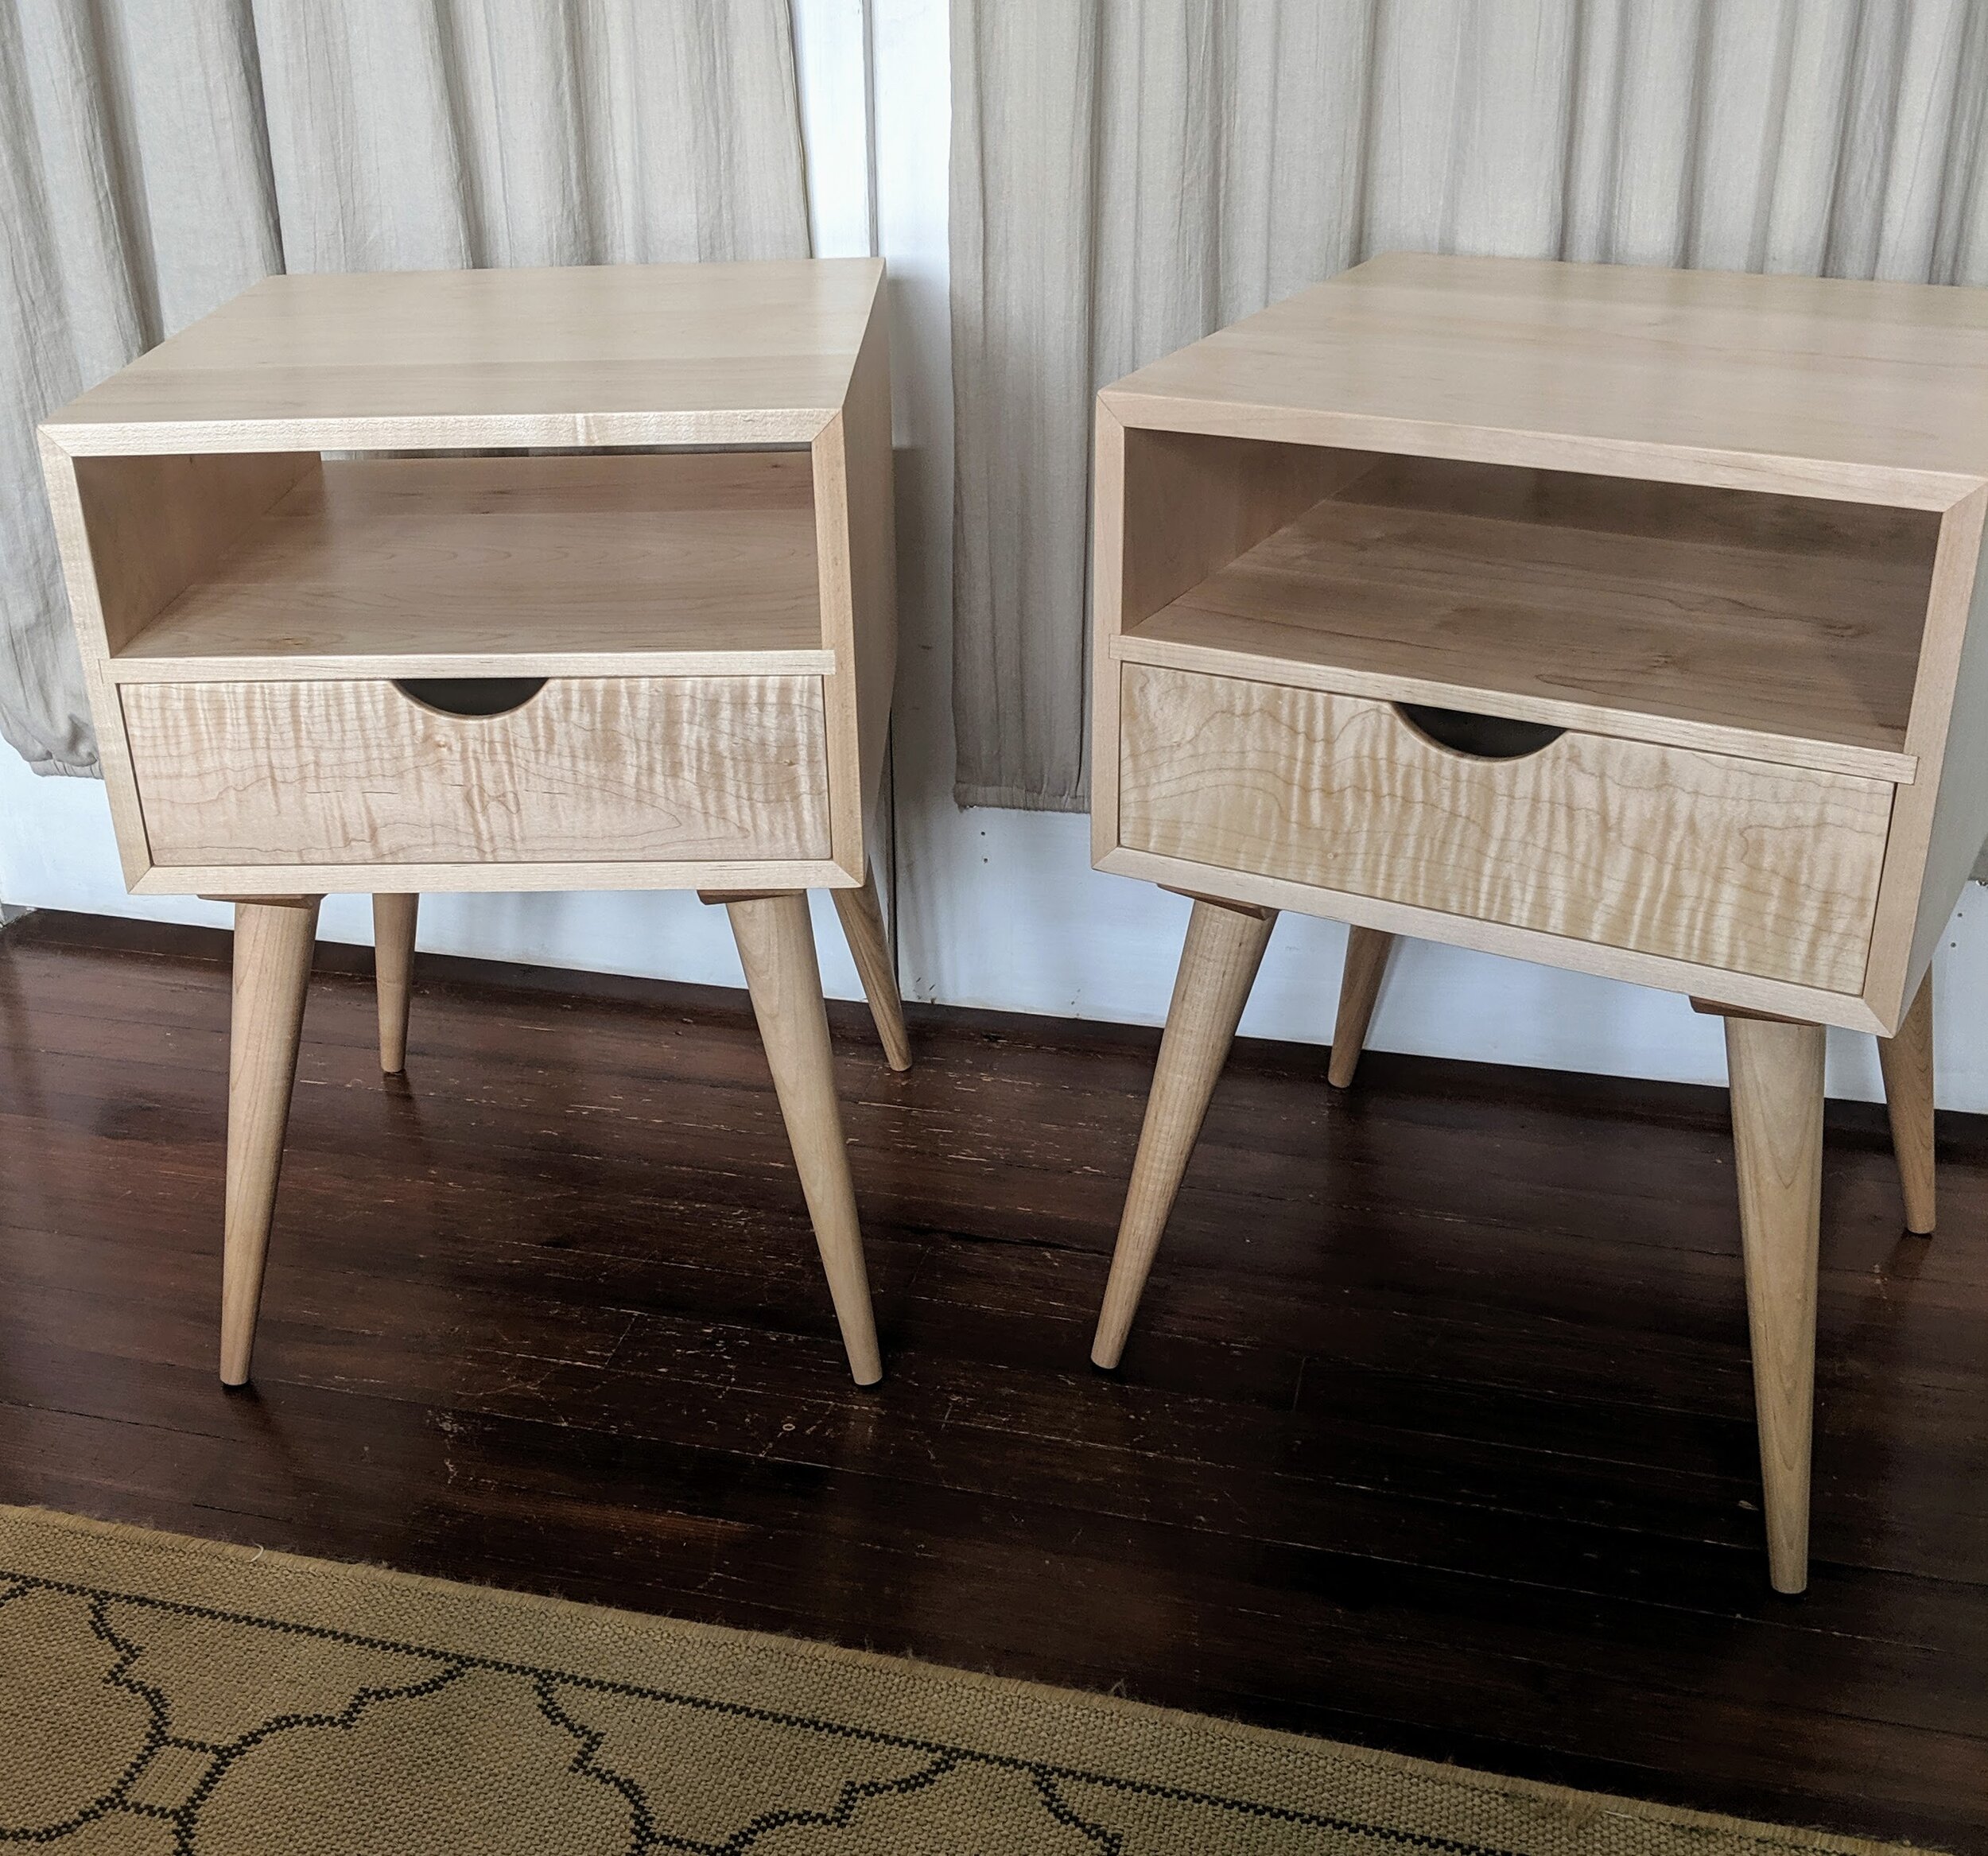
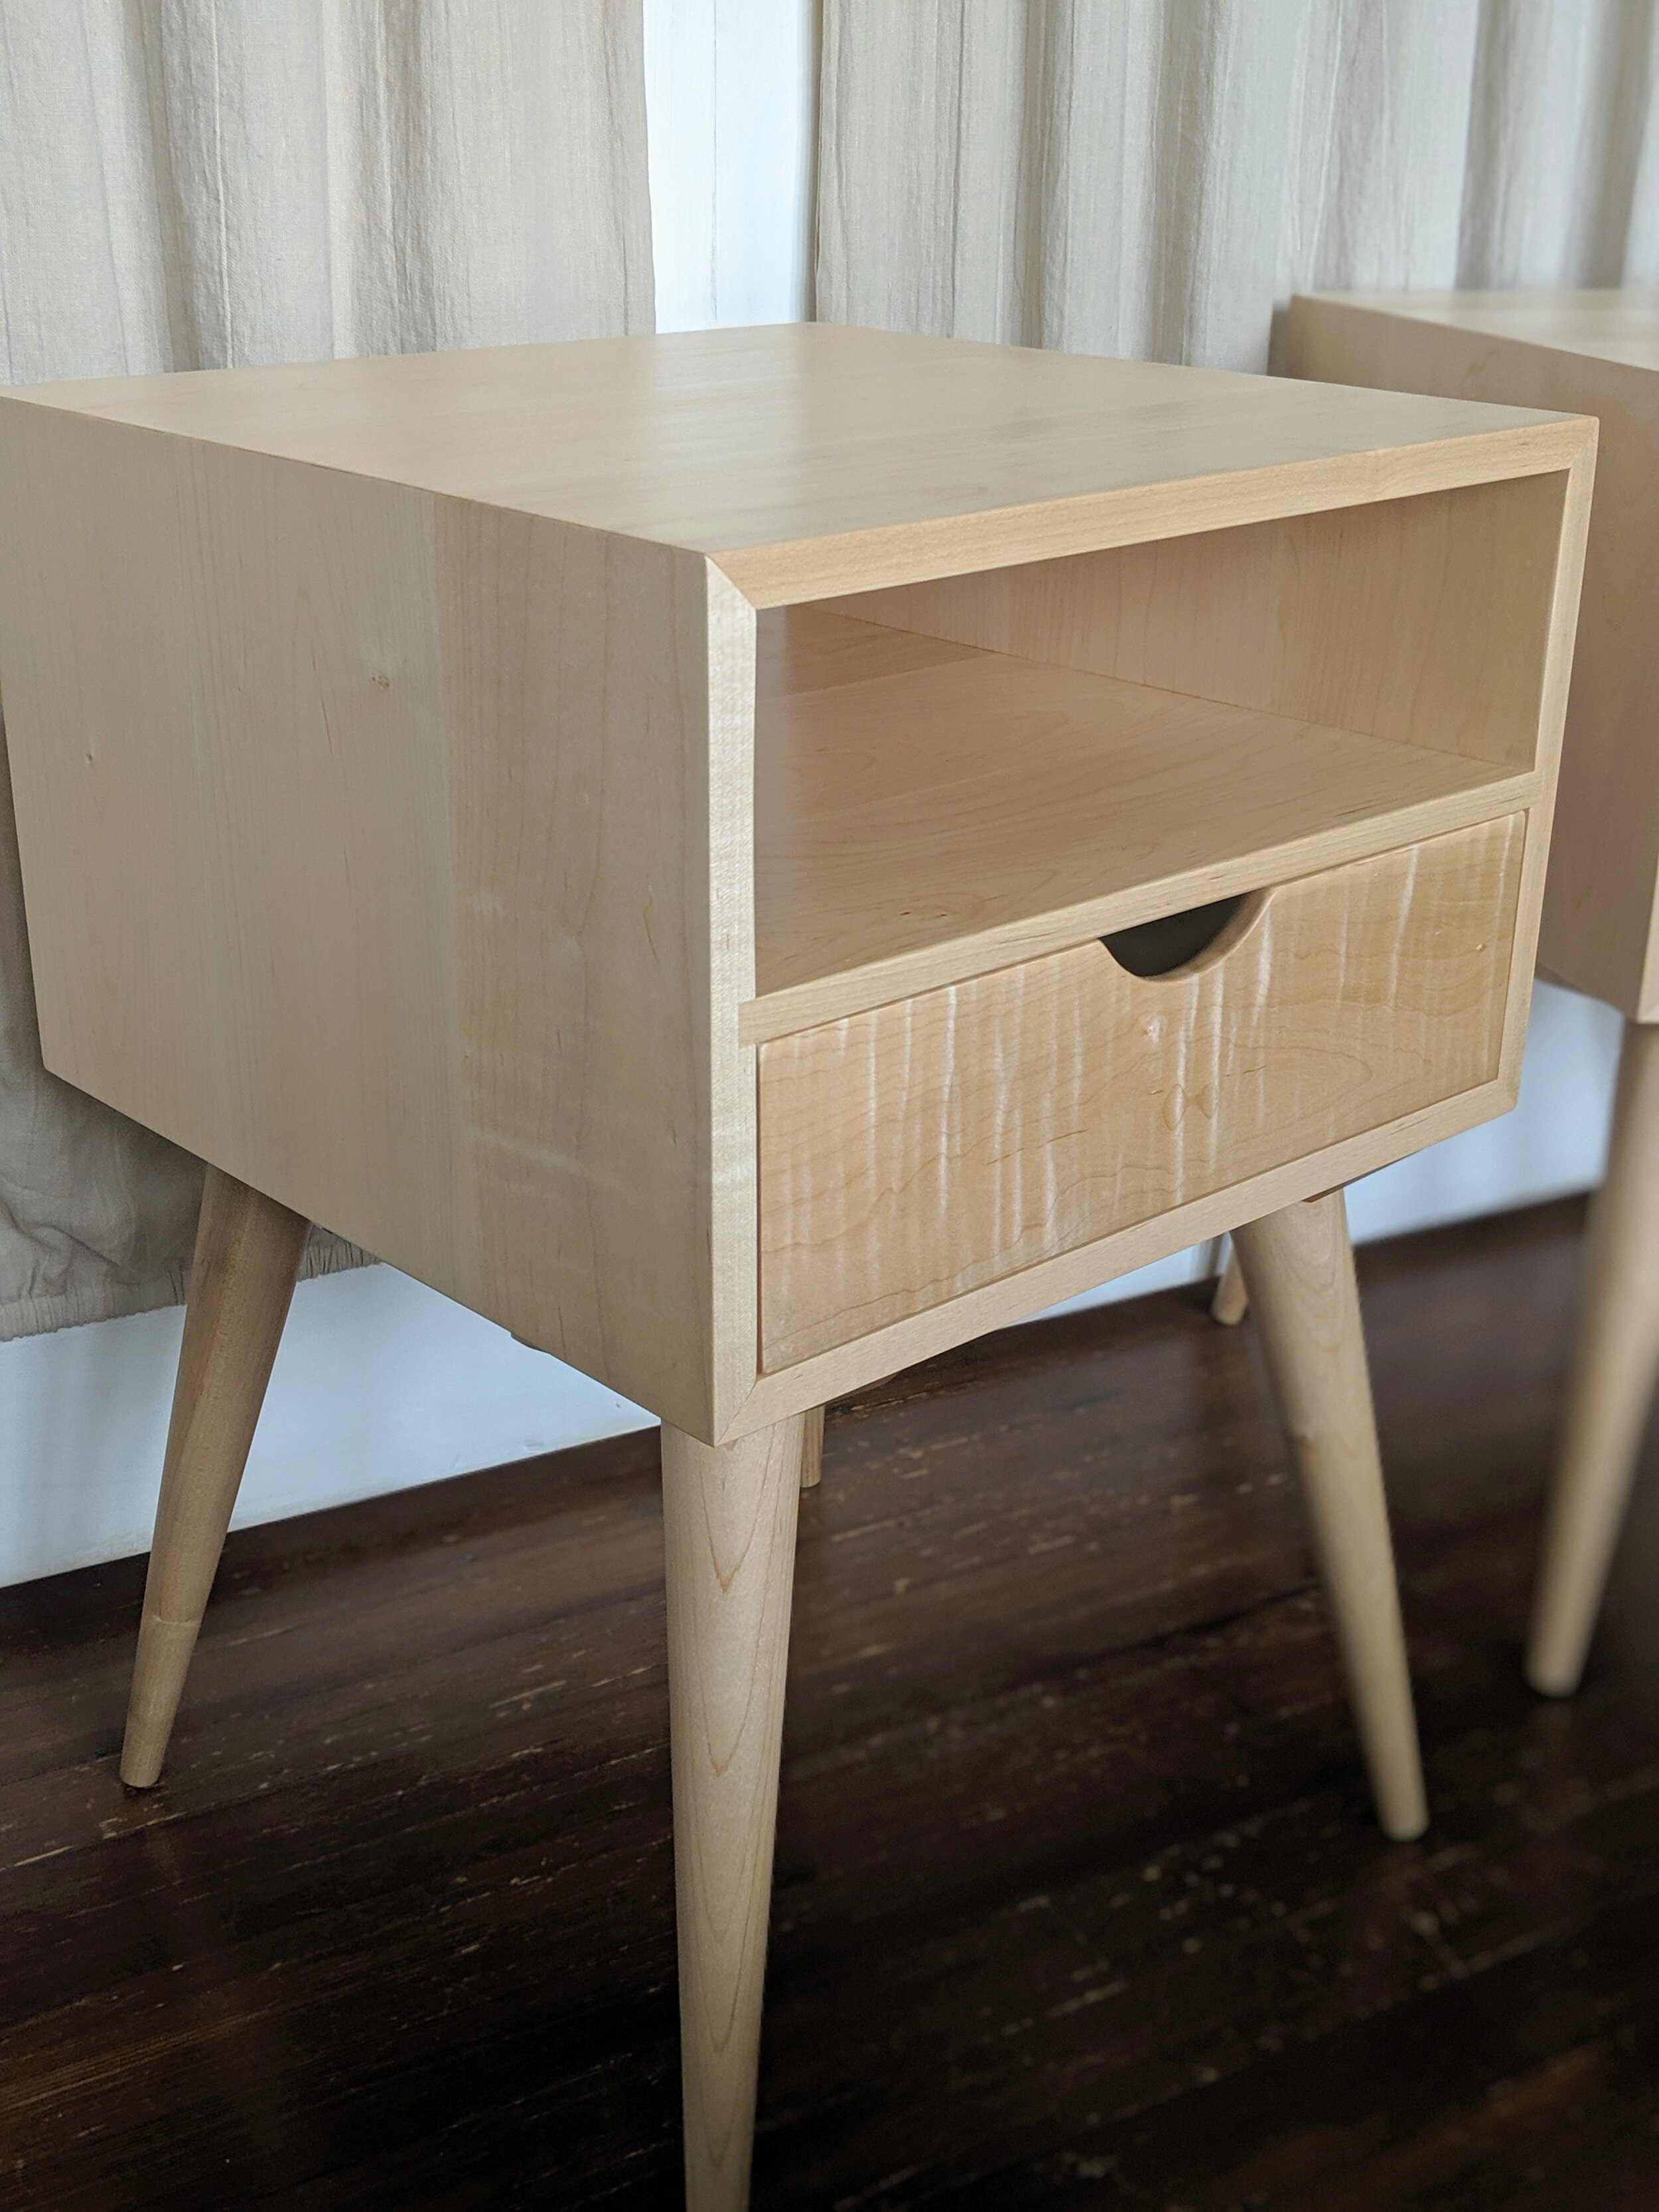
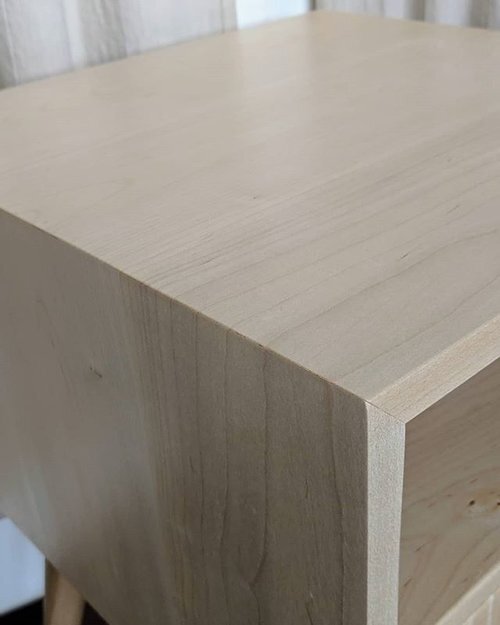
In the case of these bedside tables, my client and I decided on a pair of matching tables with dimensions of about 25” tall (overall height), 18” wide and 18” deep. The tables would have a shelf that split the case in half with the upper half being an open shelf and the lower half being a drawer. Each of these were about 5” in height. The tables would also feature round splayed and tapered legs. Lastly, we decided to build these tables out of solid maple wood and use a natural oil finish.
The Build - Milling the Lumber
As with all my builds, once the design is figured out I turn my attention to selecting the best wood possible for my builds. I hand select all of my lumber in order to find boards that are the width that I want, but also so that the boards match in color and grain patterns as much as possible.
In this case, I am using 4/4 maple for the case components of the table. Since the table is 18” deep, I wanted to find two boards that were greater than 9” wide to reduce the number of boards and that would reduce the number of glue-ups. I am fortunate enough to have a 12” jointer so I can get wider boards; the specific reason I bought the larger joiner in the first place.
Picking through a stack of maple looking for the perfect pieces
You learn to see what lies below the rough surface, but you never truly know until you begin to mill it
After the lumber is selected, I go through the process of selecting which boards I want to be which part of the tables. For example, the case pieces, the shelf and the drawer front. I am doing a continuous grain pattern from the sides and across the top so I need pieces that are about 40” long; 11” inches for each side and 18” for the top.
Miter saw is an easy way to break down your rough pieces
These lengths are then run across the jointer to get them perfectly flat and then through the planer to get them to their final thickness.
You can see the cup in this board. The jointer will make this piece perfectly flat
Then, I glued up the individual parts. Normally, I would not break down the table into their individual side, top and bottom pieces at this point; I usually do it after I have glued the full-length pieces together, but in this case I did and it came out fine. I just had to be very careful about maintaining my edges when clamping the pieces together.
This is actually not the best way to do it (breaking the pieces down early) because you want to do as little cutting and trimming as possible to help maintain a very clean continuous edge; I got a little lucky here!
Assembling the Cases
Once all of the case pieces were glued and cleaned up, I used tilted my table saw blade to 45 degrees and used the Incra 5000 table saw sled to cut the 45 degree bevel on all the pieces; this would give me the nice continuous grain wrapping. Next, I used a dado stack in the table saw to cut a dado in the side pieces that would house the middle shelf. Lastly, I used a Festool Domino to cut tenons into the miters. These domino tenons will provide much more support than just glueing the miters themselves. Miters like this are largely an end grain-to-end grain glue joint, which is not a strong joint. Adding something like a domino, a biscuit or even a dowel, will add much more strength to the joint once glued.
Miter detail on the cases
Then, I dry fit the case to check alignment and get the measurement I would need for my shelves.
Cases dry fit and ready to receive the shelf and then glue-up
Once the shelves were built, I fit them into the cases and glued them in place. It is important to maintain the same grain orientation as the sides and the top; this will ensure the shelf grain expands and contracts in the same orientation as the rest of the case. No cross-grain joints here.
The case and shelf drying in clamps and building the drawer boxes
Once I had the case in the clamps, as seen on my bench in the above photo, I could get the measurements for my drawer and begin building it. I used poplar wood to build my drawer boxes; it is a great secondary wood for things like this. I used my Liegh D4R dovetail jig to make quick work of the drawer for each side table.
I am using full-extension drawer glides on these drawers, which are about 16” deep. I don’t want to make the drawers too long. If they are too long, there could be a tendency for the table to tip if there is too much weight out in the front of the drawer when fully extended.
I decided to use a piece of figured maple for my drawer fronts on this piece. I thought it would add a really nice design element to the piece and draw your attention to them. Here I am using business cards to fit the drawers to the case. I am looking for an equal reveal (gap between the drawer and the case) all the way around the drawer front. Any fine tuning is done with a hand plane.
Using spacers, business cards in this case, to get a uniform reveal around the drawer front
Adding the Legs
Ok, I admit it...I cheated. I did not build/turn the legs for these tables. At some point, I had come across TableLegs.com and saw a set of Mid Century Modern legs, round and tapered, and thought “these would be cool to use sometime”. So, when this project came about, I knew I had the perfect legs in mind. What I liked most about these legs is their mounting system. They actually have a “base plate” that you screw into the bottom of your piece. It is milled in such a way that the base plate has the angle built into it, not the legs. So then the legs are threaded into these plates and a 90 degree angle, but the plate gives you the nice flared leg you are looking for. The threaded insert in the base plate, as well as the threaded rod in the leg itself, are very heavy duty and not flimsy like you see in other systems. I was impressed.
The Finish
The other furniture in my clients bedroom is very modern, light and airy. The floors are white oak, with a natural finish on them, no stain. The other furniture is also maple and clear. So it was a no brainer to use a natural oil finish on these tables.
I sanded all of the surfaces to a 220 grit and then wiped everything down with a clean rag and mineral spirits to remove all the dust. Wiping down with mineral spirits also allows you to see any glue marks you may have missed while sanding.
I then used a clean rag to apply two coats of OSMO Polyx clear satin oil to the surface. OSMO is an oil and wax mixture so the oil penetrates into the wood, as a tung oil would, and the wax remains on the surface to provide a surface barrier. When you apply a second coat, it “reactivates” the previous coat, allowing the oil to soak back in again. Once the oil has set, and soaked in, for several minutes, I buff it dry with either a white, non-abrasive, pad or a clean rag. This product, although expensive, really lasts a long time in the can and a little bit goes a long way.

Conclusion
Having now built several Mid Century Modern style pieces of furniture for clients, I can understand and appreciate the appeal. When built right, the furniture is clean in design yet allowed to be complex in execution. I was very glad to be able to provide my client with her very own set of “adult tables” for her space and I look forward to building more pieces for her!
I hope you enjoyed this project as well. To receive future blog post updates, please consider subscribing below!
Disclosure: Some links in this article are affiliate links meaning, I may get a small commission if you purchase anything from these links. Thank you for your support!


About Me…
Welcome to my blog. My name is Derik VanVleet and I am the owner/builder of VanVleet Woodworking llc. I hope you find this blog useful and insightful. Feel free to leave a comment in the bottom. Thank you!